I love to write knitting project details and my Acorns Project is no exception!
I italicized and strengthened all the key points of my Acorns knitting so readers and myself can better locate a particular part.
Started an Acorns KAL on the Twist Collective group. Visit it here.
8/24/10: Bought pattern.
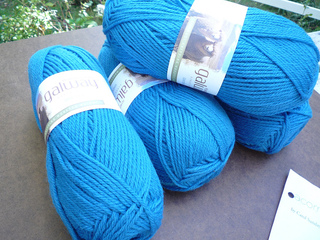
9/12/10: Bought Plymouth Galway yarn in Teal colorway.
9/16/10: My six skeins of Galway arrived in the mail today. I started swatching already. I am following the directions of making a gauge swatch from a book called “When Bad Things Happen to Good Knitters.” I am making a lengthy swatch using three needle sizes: a size 6, 7, and 8. I am doing it this way in hopes of not casting on another swatch. I just don’t like to go through the process of swatching, washing, and blocking multiple times. It drives me crazy! And let me guess… I will probably wind up needing a size 9 needle! :D
An Acorns KAL member was asking me about this multiple-needle gauge swatch. Below is my reply to her. I thought some of you might also be interested in what I did:
Hi zilredloh,
I am the one that mentioned that special type of gauge swatch. I learned how to do it from a book called “When Bad Things Happen to Good Knitters.” This is what you need to do:
First take note of the pattern’s gauge. It is 18 sts x 25 rows = 4”.
Pick out three needle sizes. I used the recommended needle (size 7) and two extra ones, size 6 and size 8. I wanted to hover around the size 7, you see.
Next, cast on a number of stitches that is more than the pattern’s gauge stitch count. I did 18 sts plus 12 extra, (6 sts on either side of the 18 sts), it is important to have extra stitches in order to make a more accurate measurement with your ruler; those edge stitches can really throw you off!
Knit in garter stitch for the first four rows. Switch to stockinette stitch and begin and end each row with 3 knit sts, until your piece measures 4 1/2” to 5”. (Remember, extra length is going to help with your measuring)!
After the right length is reached, knit two rows of garter stitch and switch to your next needle size. Repeat the same process as the first. End the group of swatches with four rows of garter. Bind off.
To help with future reference, try purling the needle size in each of your three swatches. For example, if you are using size 7, purl seven stitches in the right bottom corner of the swatch. Now you always know what needle you used!
Have fun!
Rebekah
9/19/10: So, yeah, I used three different needles for my swatch but none of them resulted in the correct gauge. After washing the swatch and blocking it, I measured and here is what I found:
size 6 = 19 1/2 sts x 27 rows
size 7 = 19 sts x 26 rows
size 8 = 18 1/2 sts x 25 rows
The Acorns’ pattern gauge is 18 sts x 25 rows = 4”/10 cm
The size 8 is SO close! Only half a stitch off! I would naturally go up to size 9 but that will throw off my row gauge. It will probably wind up being 24 rows per 4”. Ah, gauge swatches, gotta love them, right?
So I’ve decided to do what I’ve done before and that is using my gauge but a different pattern size. I’ve done it with my Liesl shrug and Veste Everest and I had good results. I will be doing the 39.75” size on size 8 needles. It will result in a slightly smaller measurement… The finished bust will be 38.7”. That will give me nearly 3/4” of ease. OK now, I am going to cast on.
9/21/10: I am a few rows in now and I’ve been going as fast as people move on Monday mornings. :) Every few stitches I make a realize that I am doing something wrong so every ten minutes I am ripping back. It is a tad bit frustrating but I know that I am learning a lot of new things.
9/29/10: News Flash! Rebekah has finally figured out her major Acorns dilemma. My previous problem of the acorn stitch pattern not coming out right was caused by my inability to read the chart! I kept on repeating the entire Chart Rows, not the repeat section enclosed in the red box. So I absolutely messed up the whole process and almost every stitch I made was incorrect. But I am so thankful that I figured it out and am rolling right along. I never used a chart before so this experience has been a real eye opener! So technically, I started Acorns on September 27. :D
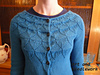
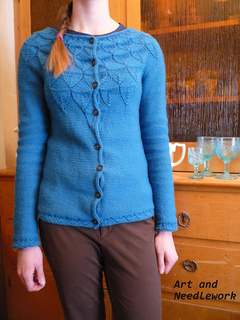
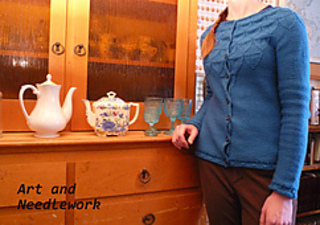
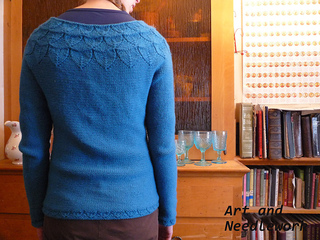
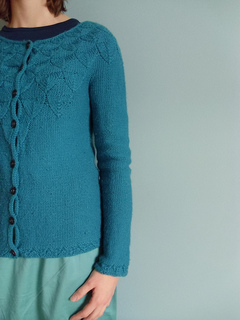
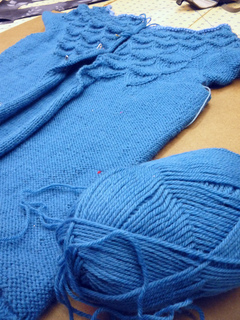
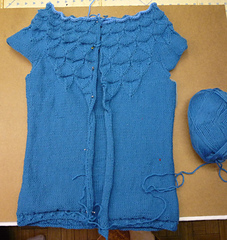
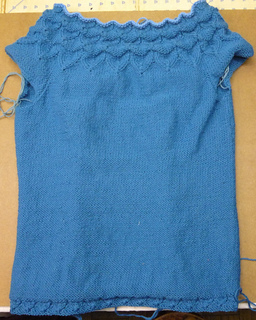
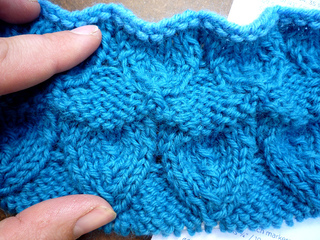
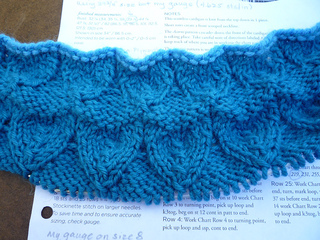
9/30/10: I just added some photos of my progress. I am 21 rows in. The third photo from the bottom depicts the yarn color the best. I am SO happy to see the acorns coming to life!
10/19/10: I’m still knitting away but I did have to pause for a few days to work on a pair of hand warmers for a birthday. So I am back in the game and I am working the BODY right now and will be starting the waist shaping soon. It is coming along well and I am getting faster and faster with my chart reading.
10/26/10: I’ve been working on the waist shaping still and have almost reached the Increasing Rows. I am now officially done with the chart--something I am beginning to miss actually. Never thought I would say that!
Because I am tall, I am going to add some extra inches to the length of the Body to make the sweater 25” long--from shoulder to hemline. I wasn’t sure where to add them, but after talking about it on the KAL thread, I decided to add 1 3/4” before the Inc Rows and 2” after, in the areas where the pattern says “work even”. I chose to do it this way after I measured myself. I took tailor’s tape and measured the distance between my armhole and natural waistline, as well as from the armhole to 1” above my imagined hemline. (I measured 1” above because the Border is about 1” in length). Here is what I found:
Armhole to waist : 9 1/2”
Waist to 1” above hem : 15 3/4”
In the pattern I am suppose to knit until Body measures 7 3/4” from armhole before Inc Rows. I need to add 1 3/4” to that length measurement to make it 9 1/2”.
After the Inc Rows, the pattern says to work even until piece measures 12”. After adding my extra 1 3/4” to that 12” I have 13 3/4”. I need it to be 15 3/4”, so I will add 2”.
Now let’s see if all my numbers--and the schematic’s--add up to 25”. Remember, I am doing size 39 3/4”.
Shoulder to armhole: 8 1/4”
Armhole to top of border: 15 3/4”
Border: 1”
The total is 25”! Yay! That’s a lot of inches to add but that’s what happens when you are 6’ 4”. ;)
11/18/10 I’ve been doing lots of sewing lately so Acorns had to stay in my tote bag for a long time. It was harder for me than for her (my sweater, you know). :) My step mom ordered three dresses and three jackets from me so you can see why my “needle and thread” has been of a different sort lately.
So where am I at? I finished the entire Body, did the border near the hem, and bound off using the sewn bind off. I’ve never done that technique before but I knew as soon as I slipped off my first stitch, that it was a thing of beauty. It reminded me of my knitting machine bind off.
After I bound off, I began working on the left front button band. Since I never picked up stitches vertically, it wasn’t easy for me to figure out where to put my needle. Like many things in life, I just needed time to observe everything. Eventually, I learned that I had to insert the needle between the two “bars” and under the two top loops that resembled a crochet chain or stockinette stitch. Yeah, that sounds cryptic, doesn’t it? Mainly wrote that for my benefit. If you need some more info on that subject, go over to youtube.com--there’s lots of videos on it; something I wasn’t aware of until after I was done!
So I picked up along the right front edge (while making my buttonholes. I needed eight for my altered sweater), and stopped at the neckline. I decided not to continue and pick up the neckline and other front. I’ve been reading from other Acorn knitters, that the neckline is sometimes too wide. Since I have broad shoulders I shouldn’t have a problem with this, but just to be on the safe side, I devised a backup plan. I will knit the right front buttonband, the neckline, and the left front band all separately. So if I do find the neckline too off-the-shoulder, I will rip out that section and perform more decreases; and I’ll do all this without disturbing the right and left fronts.
And oh, for whom it may concern, when the pattern says “right front or left front”, it means when the sweater is being worn, NOT when you are viewing it. When I started out in sewing and knitting, that always confused me!
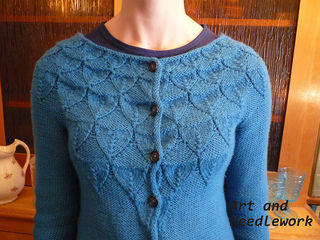
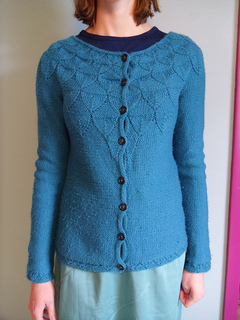
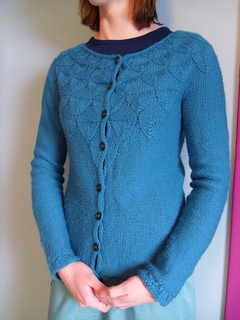
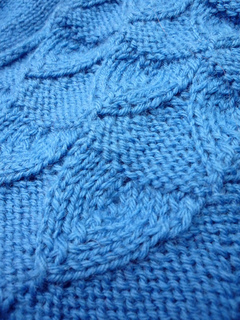
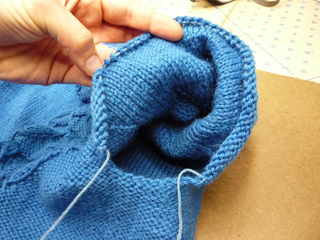
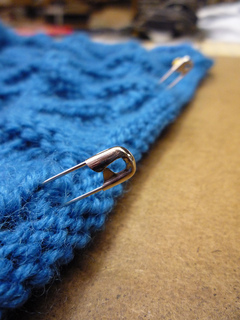
11/22/10: Just added some photos of the sweater today. Way over due! The fifth from the bottom is a close up of the button band, the sixth is of the armhole stitches on waste yarn, and the eighth one is a close up of the front. I wanted to show you, via the eighth image, what a little bit of steam can do to make the acorns lie flat. I steamed the right side and left the left side untouched. What a difference, huh?
12/29/10: Almost the end of the year and almost the end of this sweater. I just finished the first sleeve and will be begin on the second promptly. Sweater knitting can really take a long time for a person who likes to take on other projects mid-knitting. Such as sewing two dresses, two jackets, crocheting two fingerless gloves, knitting a hat, and sewing a bolero. Yeah, it appears that items for myself take 110% longer than if I was knitting for someone else. ;) Fortitude, I most have fortitude!
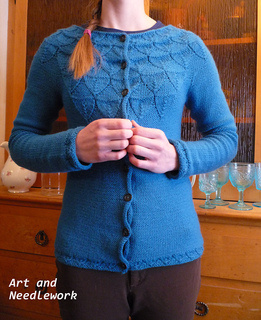
1/17/11: I’ve done and did it! I finally finished my first-ever hand knitted sweater and I am very proud of what I’ve done. This is a huge accomplishment for me and I’m so happy that I selected Acorns. It is such an ingenious pattern, with its seamless construction and fun acorn stitch pattern. I rarely got bored knitting this one, the only time that I felt like hitting my head against the wall was during the sleeves. Those sleeves seemed to have taken forever to do.
Anyhoo. Is there any last minute note I should write down? Well, my alterations worked out very well. I added inches to the body length as well as the sleeve length and this would have to be my only garment that actually has sleeves that reach my wrists! THANK YOU CAROL SUNDAY FOR CREATING THIS SWEATER! I ADORE IT!
See my crafting blog to read more about this sweater.
*Side notes:*
Tips on short rowing: I wasn’t sure if I should regard the lifted loop--the one marked with the CC yarn--as a stitch or simply a loop to work with the adjacent stitch. Sundayknitter (Carol Sunday) confirmed that I should regard it as a stitch. So when making the K3tog on Row 3, perform it using the lifted loop and the next two stitches.
What I think of the yarn: I’ve used two other types of wool yarn before all of which were from Brown Sheep Yarn Co., and I have to say that Galway surpasses them. I have no problems with splitting and it is soft even before washing. After I washed my swatch it was so soft I thought it resembled an acrylic baby yarn. Wow, huh?!
I hand washed my finished sweater and I did notice some dye run in the water. I may want to avoid this yarn when doing colorwork; or just make sure that I do a test run.


 needlestohook notebook
  handspun
 queue
queue favorites
 friends
 needles & hooks
 library